Installation Instructions (download pdf here)
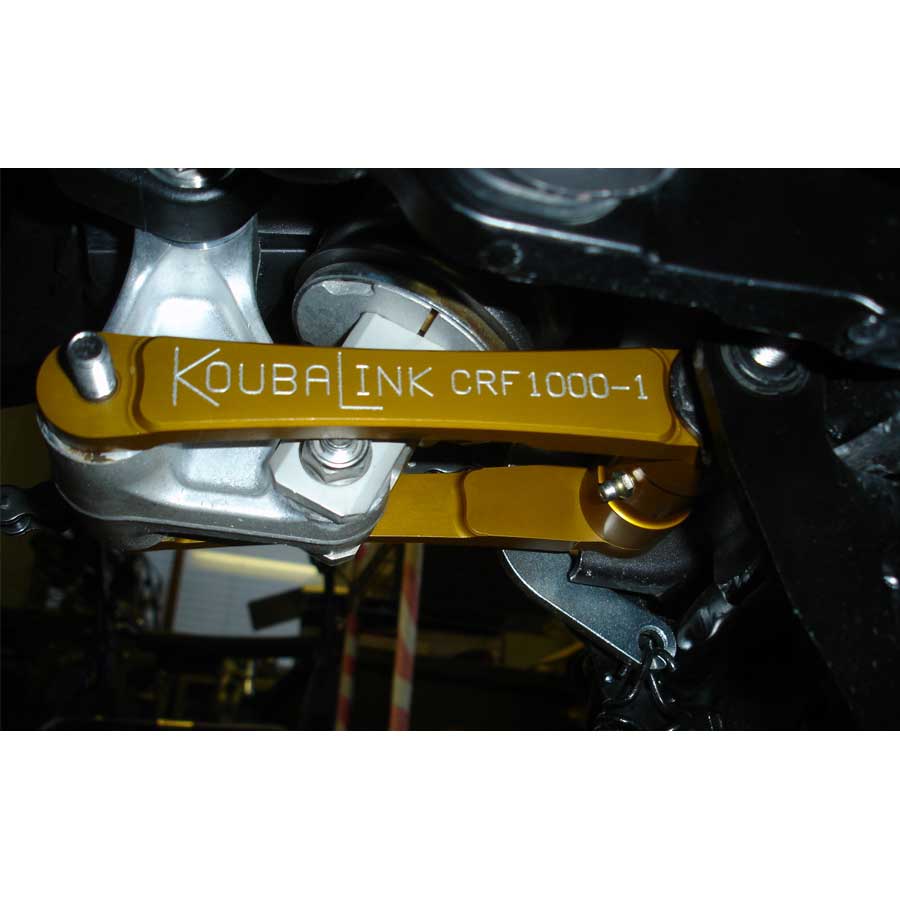
1) Raise the rear of the motorcycle with a jack under the engine so the rear wheel is just slightly off the ground. The best way is to tie the handle bars down to floor side mounts so the bike cannot tip over. Be careful where you put the jack and try to get it towards the rear of the engine so you are mainly lifting the rear. We use a wood 2 X 8 about 10" long on top of the jack. If you have the optional center stand then just pull it up on that and your good to go. Remove the two 17 mm nuts from the link mounting bolts (both 14 mm headed mounting bolts come in from the left) Remove the two 8mm Allen headed bolts from the left foot peg/side stand mount to allow the front link mounting bolt to come out the left side. If you have the center stand then it must be down to remove the front link mounting bolt. Push both mounting bolts out the left side. *The swing arm may need to be raised slightly to allow the first bolt to slide out freely*.
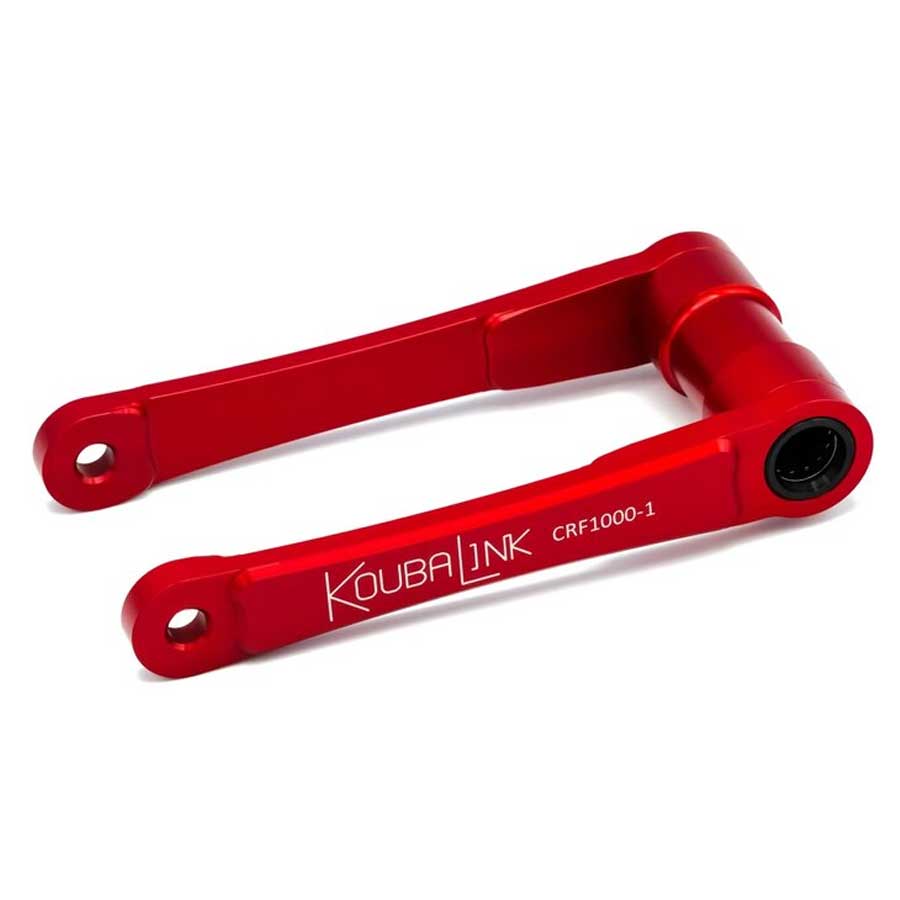
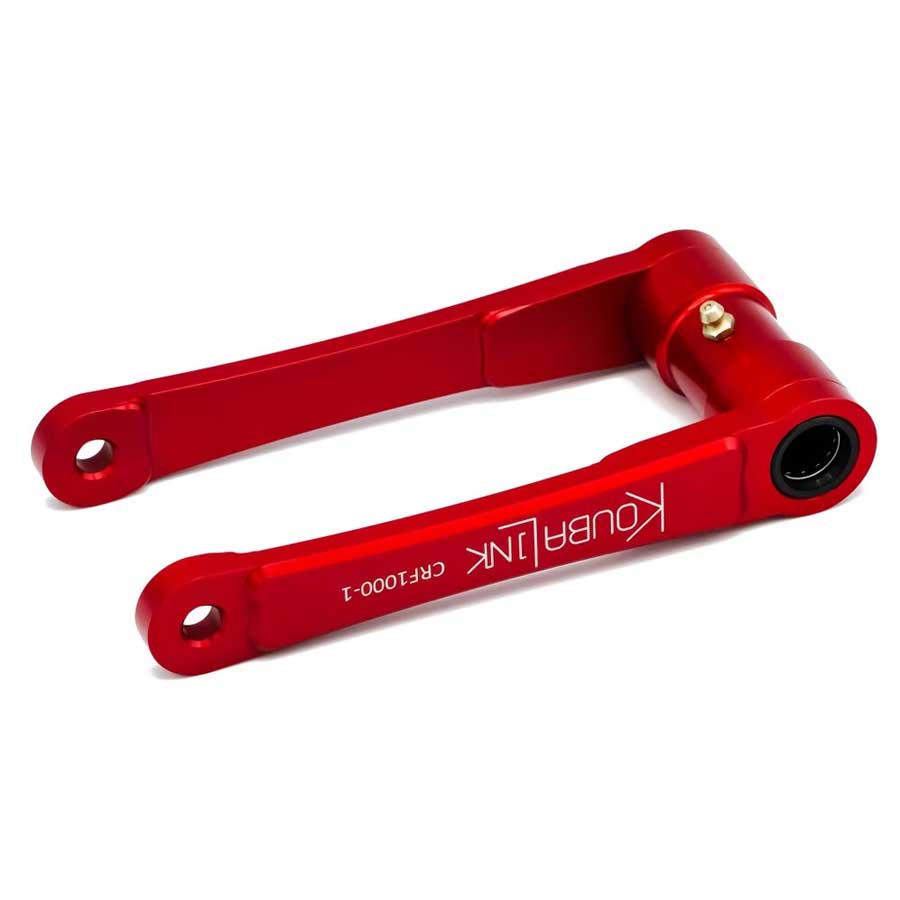
2) The new link comes with only the bearings and seals, so install the center bearing sleeves from your OEM link into the new KoubaLink. Put some grease inside the Koubalink's bearings and also on the center sleeves before installing them in the KoubaLink. Install the Koubalink by holding it up inside the front and rear mounting brackets with the grease fittings facing down, push the front mounting bolt in from the left side. You will have to raise the swing arm slightly to allow the rear link eye to align with mounting clevis eyes before pushing the rear mounting bolt in. You may want to pump some grease into the zerk now as sometimes tightening the mounting bolt nuts can seal the bearings too tight to allow the air to escape. Install the 17 mm nuts on the mounting bolts and torque to approx. 40 lbs.-ft.
3) Put some blue or red thread lock on the threads of the two 8 mm Allen headed foot peg mounting bolts and reinstall the left foot peg/side stand mount. Torque to 40 lbs.-ft.
4) You can slide the fork tubes up a bit (maximum 1/2" from when the flange on the top caps are flush with the top of the fork tube) to get more lowering but how much you need to slide them up will depend on the amount of rear race sag your running and how you prefer it to ride. We do not recommend sliding the fork tubes up from the stock position unless quicker turning is required. Just keep in mind that lowering the rear more than the front slows the steering but also makes it more stable on the striates and vice-versa.
Disclaimer: lowering the rear more than the front can change the geometry and could affect the handling, so be careful.


 View Order / Checkout
 Continue Shopping